Pantry moths have a special talent for showing up right after you buy new flour. One day everything looks normal. Next day you spot a tiny moth, then another, and suddenly your rice feels suspicious.
Here’s the bottom line: to stop pantry moths, you need to break their life cycle and remove their hiding places. Airtight jars handle the “access” problem. Labels handle the “I forgot what this is and how long it’s been here” problem. Together, they turn your pantry into a place moths can’t settle into.
This approach is low-tox, renter-friendly, and realistic for busy weeks. It’s also a little satisfying, like putting your kitchen on rails.
Why pantry moths keep coming back (and what airtight jars really fix)
Pantry moths don’t usually arrive because your kitchen is messy. They often hitchhike home inside dry goods, like flour, cereal, rice, nuts, and pet food. The tricky part is that eggs and tiny larvae can be hard to see at first, especially in folded bag corners and cardboard seams.
So when you switch everything to jars and still see moths, it can feel personal, like they’re mocking you. They aren’t. You’re just seeing the last chapter of a story that started in the package.
For a plain-language refresher on what they are and why they’re so persistent, see how experts recommend preventing pantry moths.
Airtight jars do three important jobs at once:
- They block new moths from reaching food to lay eggs.
- They trap hitchhikers inside one container, instead of letting them spread pantry-wide.
- They make problems obvious, because webbing or larvae are easier to spot through clear walls.
That last point matters. A jar is not only a barrier, it’s a window.
If moths show up after you “sealed everything,” the food likely already had eggs or larvae. Jars don’t erase that, they contain it.
This is why the first win is containment, not perfection. Once the food is isolated, you can clean, toss, or treat items without playing whack-a-moth across the whole shelf.
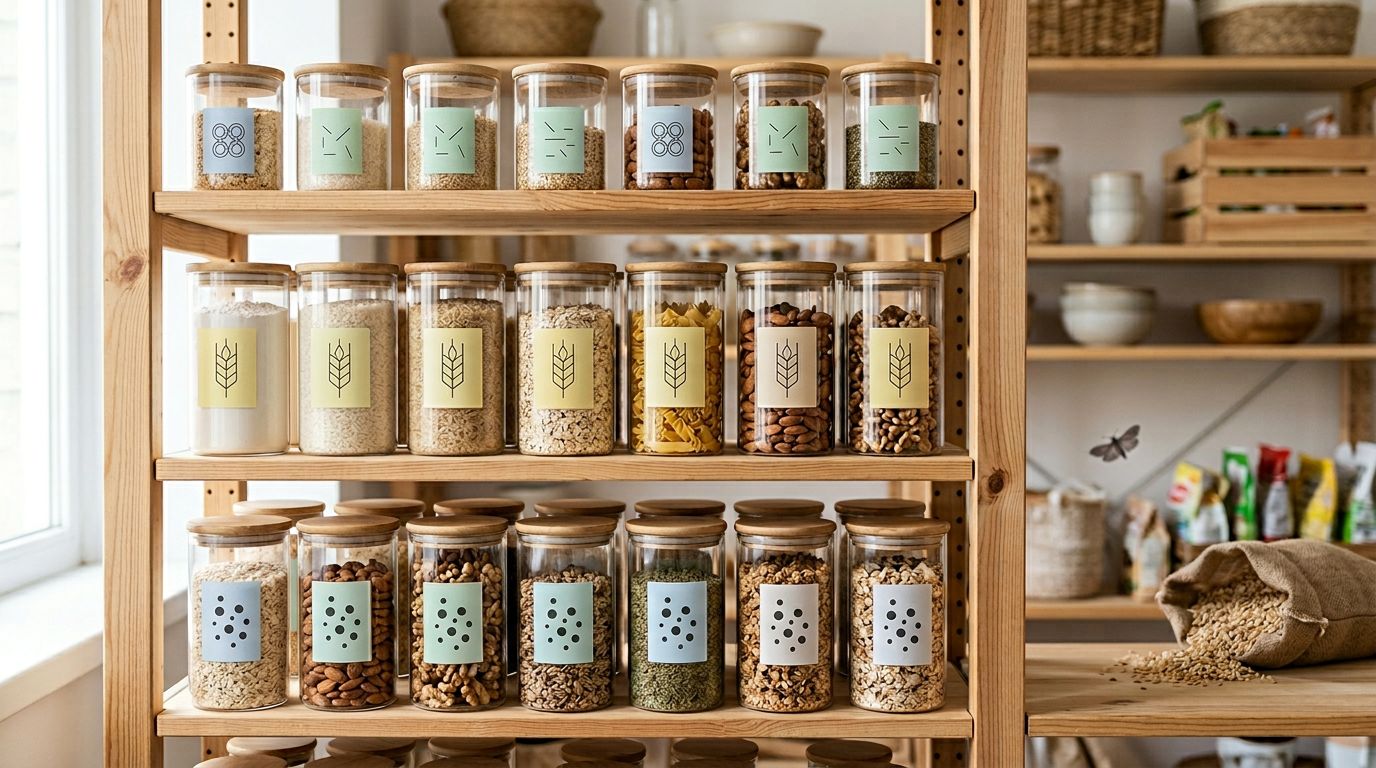
Picking jars that stay sealed (and won’t make you hate your pantry)
“Airtight” is one of those words that gets used casually. For pantry moth control, you want containers that close with real pressure and a gasket, not a lid that kind of sits there politely.
Glass jars with rubber gaskets work well, and so do sturdy plastic containers with tight seals. What matters is the seal, not the aesthetic. If you want a tested round-up of options and lid styles, this review of dry food storage containers tested for performance helps you see what actually holds up in daily use.
A few practical rules keep the system simple:
- Match the jar to the ingredient: Wide-mouth jars for flour and oats, taller jars for pasta, smaller jars for nuts and chocolate chips.
- Avoid “mystery gaps”: Flip-top lids should have intact rubber rings, and screw-top lids should close smoothly without cross-threading.
- Don’t decant into shaky peace: If a lid pops off easily, that’s not airtight, it’s just hopeful.
Once you’ve got the basics, set your shelves up so you can see everything at a glance. Visibility reduces overbuying, and it also reduces the chance you’ll miss a problem.

One more thing that saves sanity: don’t try to jar your entire pantry in one night. Start with the high-risk items first, like flour, oats, cereal, rice, and nuts. Those are the usual moth favorites, and they’re also the foods you’ll resent throwing away.
Labels are the quiet hero, because memory is not a storage plan
Airtight jars keep moths out, but labels keep you from sabotaging yourself later. Without labels, “mystery white powder” becomes a guessing game, and old ingredients linger long enough to invite trouble.
The best label system is boring on purpose. It should take seconds, not minutes. Think of it like a name tag at an awkward party. It prevents misunderstandings.
A simple two-line label works for most households:
- Line 1: what it is (for example, “All-purpose flour”)
- Line 2: the date you decanted it (or the best-by date if you prefer)
That date is more than a freshness reminder. It’s also a tracing tool. If moths appear again, you can quickly see which items came in around the same time.
Here’s the part people skip: add a tiny “opened” or “decanted” date even if the original package had a best-by date. Pantry moth issues often track with when you brought something home, not only how long it can sit.
For label materials, you’ve got options. This table keeps it quick.
| Label type | Why it works | What to watch for |
|---|---|---|
| Painter’s tape + marker | Cheap, fast, removes cleanly | Can peel in humid kitchens |
| Dissolvable labels | Clean look, easy jar reuse | Needs a quick rinse to remove |
| Label maker tape | Very readable, consistent | Adhesive can be stubborn on some jars |
Takeaway: pick the one you’ll actually use on a tired Tuesday.

If you want an extra layer of safety, create a “new arrivals” spot. Many home cooks freeze certain dry goods for a few days before moving them into the main pantry. That small pause can keep a hitchhiker from becoming a full-blown cycle.
The clean reset that makes jars and labels actually work long-term
Jars and labels are the system. Cleaning is the reset button.
If you’re already seeing moths, do one focused pantry clear-out. Pull everything off the shelves, then vacuum corners, peg holes, shelf edges, and any crack where crumbs hide. After vacuuming, wipe surfaces with warm soapy water, then let everything dry fully. Finally, toss the vacuum contents outside right away, because you don’t want your vacuum acting like a moth taxi.
While you’re sorting, be picky. Discard anything with webbing, clumps, odd dust, or movement. If you feel torn, remember this: saving a five-dollar bag of flour can cost you weeks of frustration.
If you want a solid, practical run-through of removal steps and what to check, this guide on getting rid of pantry moths lines up well with what most households need to do.
After the reset, keep it steady with a tiny weekly routine that doesn’t require motivational music:
- Shelf scan: Look for stray moths, fine webbing, or crumbs around jar bases.
- Seal check: Press lids, make sure gaskets sit flat, and re-close anything crooked.
- Crumb sweep: Wipe the shelf edge and corners where dust collects.
That’s it. The point is to catch small problems while they’re still small. If you want monitoring without spraying, pheromone traps can help you see whether adults are still active, especially right after a clean-out. Place them near, not inside, your food storage area.
When should you call for help? If moths keep appearing after you’ve discarded suspect food, cleaned thoroughly, and moved everything into truly sealed containers, it may be time to get professional advice. This overview on identifying and eliminating pantry moths is a useful benchmark for when DIY stops being efficient.
Conclusion
To stop pantry moths, you need containment (airtight jars), clarity (labels), and a short maintenance habit that keeps crumbs and forgotten bags from rebuilding the problem. Start with the foods moths love most, then expand as you replace items. Once the system is in place, your pantry stops feeling like a risk and starts feeling calm. Keep the seals tight, keep the labels honest, and let airtight do the heavy lifting.


